Pages

Showing posts with label Poultry. Show all posts

Friday, August 17, 2012

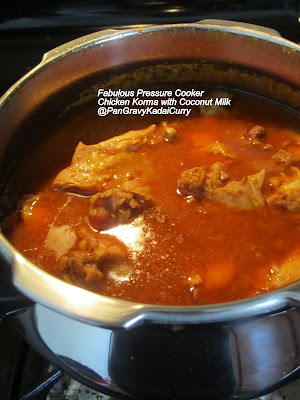
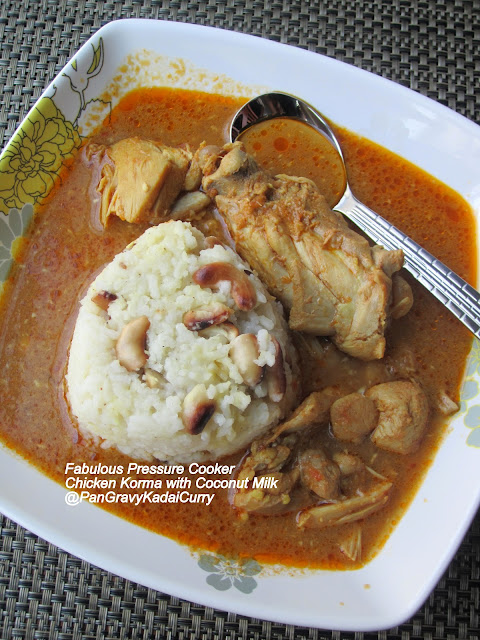
Pressure Cooker Coconut-Chicken Curry

Its been a quiet 2+ weeks on the blogging front as I was tied up with plenty of personal stuff. Its good to be back for this month's Blogging Marathon for the theme "Under 30 minute meals".

It is so hot around this time of the year and the less time I spend in the kitchen, the better for me which is probably why I chose this theme this month.This is the quickest Chicken Curry that I have ever made and I am making it frequently too -- Simply fabulous Chicke Curry in Under 30 minutes (n cutting it too close too). Thanks to my girlfriend SP. One might wonder how this is possible, but I assure you that I have attempted and succeeded too.

To make it possible you need these 3 tools:
  • Blender - To Grind the gravy ingredients
  • Farberware All-Purpose Kitchen Shears - Trimming fat and cutting the Chicken has never been this easy! I have only ever used the shears to trim fat. Then the ever resourceful 'SP' was cutting the thawed chicken with shears. This eliminates the use of a cutting board! I can't tell you how much fun I am having cutting chicken these days. I used to cringe everytime when the time came to clean the cutting board.. chicken fat clinging to the cutting board like puss on wound that took several minutes to let go and not to mention how much water I had to use up. This is a much easier and greener way.
  • Pressure Cooker - To cook the Chicken in a matter of minutes.
If you are upto the challenge, I suggest you try making the Chicken and the Pongal(SouthIndian Rice-Lentil Risotto) under 30 minutes too.


Ingredients:
  • 8 Chicken Thighs, thawed
  • 1 Medium Yellow Onion
  • 2-3 Small Tomatoes
  • 1 Tsp Fennel Seeds
  • 2 Tbsp Ginger-Garlic Paste (Or) 1/2" Ginger + 5 Cloves peeled Garlic
  • 4 Tbsp Coriander Powder
  • 1 Tbsp Chilli Powder or less/more (Note: Heat of the powder differs from brand to brand)
  • 1 Tbsp Chicken Masala Powder (I Use Sakthi brand)
  • 1/4 Tsp Turmeric Powder
  • 3-4 Tbsp Olive Oil
  • 2-3 Grated Coconut Balls (Ground to a smooth paste with little water)
  • 1-1/2 Cups Water
  • Salt as needed
Procedure:
  • Peel and roughly cut the onions. Grind it along with tomatoes plus whole ginger-garlic(if using). In a pressure cooker pan, heat the Oil. Add the fennel seeds. Pour the ground paste, ginger-garlic paste(if using) and saute. Turn the heat to "low" and partially cover the pan so it doesn't splash.
  • While the contents of the pan are cooking away, use the Kitchen Shears, trim the fat, cut the chicken into small pieces. Do not cut it too small as it will completely disintegrate under high pressure+ contained heat in the pressure cooker. This step takes about 10 minutes tops.
  • Meanwhile the contents of the pan are cooked and have lost their raw smell.
  • Transfer the chicken and all the powders. Stir well to coat the chicken. Add water and sprinkle salt. Note: Water amount can be reduced if a thicker consistency is desired.
  • Lid the pan, put the weight and let it cook for 2 whistles or 8 minutes at medium to high  flame.  Meanwhile grind the grated coconut with little water. Set aside.
  • The chicken is well cooked at this point.
  • Pour the ground coconut paste, stir and let it cook for 3-4 minutes. Switch off the stove. Check for taste. Add more salt or pepper powder(to spike the heat)
  • Serve this with creamy Pongal for Sunday brunch or lunch. Goes well with Idli or Dosai too. Yum!


How my friend made it at her home:: She added less water and slightly more coconut and the gravy was much thicker than mine and equally delicious if not more.
Enjoy!

Check out the Blogging Marathon page for the other Blogging Marathoners doing BM# 19
Read More...

Wednesday, May 16, 2012

Basic "White" Chicken Stock

This is how I have been making Basic "White" Chicken Stock at home. I usually make large batches and freeze them in small portions as I am constantly making Pot Pie(family favorite), Pulled Chicken Noodle soup or Meatball Soup...especially during the winter season when someone or the other in the family is having the sniffles.During such occasions, a good nourishing soup and rasam(South Indian Pepper juice) are a must.

Recently I tried Chicken Soup with exotic Amaranth Leaves plus a few vegetables for my friend who recently gave birth to an adorable baby girl. She said it was awesome - just what a lactating mom needs.  So am planning to give it another spin in the kitchen this weekend. Keeping my fingers crossed that I find some Amaranth Leaves in the store.

Basic Homemade Chicken Stock(For 8-9 cups):

Ingredients: 
  • 4 Chicken Thighs and a few chicken parts 
  • 2 Stalks Celery, halved and quartered ( I freeze the rest)
  • 2 Carrots, peeled and cut into sticks
  • 2 Small Yukon Gold Potatoes, cleaned and halved
  • 1 Small Red Potato, cleaned and halved
  • 2 Red Onions, peeled and halved
  • 2 Garlic Cloves
  • 1 Tsp Black Peppercorns
  • 3 Bay Leaf
  • 3 Cloves
  • 4-5 Stalks Parsley or Cilantro
  • 1/2 Tsp Dried Thyme,optional
  • 10-12 Cups Cold Water 
Procedure:
  • Place the cut celery sticks, carrot sticks, halved potatoes, halved onions, garlic cloves, cloves, bay leaf in a big stock pot.
    • Clean the Cilantro or Parsley and Thyme. Place it in the pot.
    • Wash the Chicken thighs and parts(if using) thoroughly in water. Place them in the pot and add 12 Cups cold water.
    • Place a dome lid/lid on the pot and let the ingredients simmer at a medium flame for 45 minutes to an hour.
    • Midway during this process, open and stir the contents. The mixture should look frothy like in the picture. The smell is phenomenal too.
    • After an hour, drain the contents into a colander.
    • Once cooled, divide and add the stock into smaller storage containers and freeze for future use. The stock will stay good for 3-4 days in the fridge.
    • Nothing beats home-made stock.

    Recipes that I have created with this Chicken Stock-


    Enjoy!
    Read More...

    Wednesday, May 9, 2012

    Kundapuri Chicken With Kokum "Kundapuri Koli/Kori"

    This version of chicken curry originates from the "Kundapura" region of Karnataka. Other than that I don't know much about the dish except that it is lip-smacking delicious! The specialty about this recipe is that I have tried it with Kokum to give it a sweet sour taste. Recipe minimally adapted from here.

    What is Kokum? To put it in a nut-shell, Kokum is dark purple to black, sticky and with curled edges. The fruit is often halved and dried, so that the dried seeds are visible in their chambers like a citrus fruit. It is usually available as a dried rind, resembling a thick plum skin. When added to food it imparts a pink to purple colour and sweet/sour taste. For more info, refer this site.
    Ingredients:
    • 6-8 Chicken Thighs, skinned, cleaned and cut
    • 3-4 Tbsp Olive Oil 
    • Salt, as needed
    • Cilantro, for garnish
    For the Rub:
    • 5-6 Dry Red Chilies, soaked in warm water for 30 minutes
    • 1 Stalk Curry Leaves
    • 2-3 Garlic Cloves
    • 1 Tbsp Coriander Seeds
    • 1/2 Medium Yellow Onion, diced
    For the Curry:
    • 3 Roma Tomatoes, diced
    • 2 Medium Yellow Onions, peeled and diced
    • 1 Tsp Red Chili powder or as needed
    • 2 Tbsp Coriander Powder, for thickening the gravy
    • 6 pieces Kokum
    • 2 Grated Balls of Fresh or Frozen Coconut
    • 1/4 Cup Skimmed Milk
    Procedure:
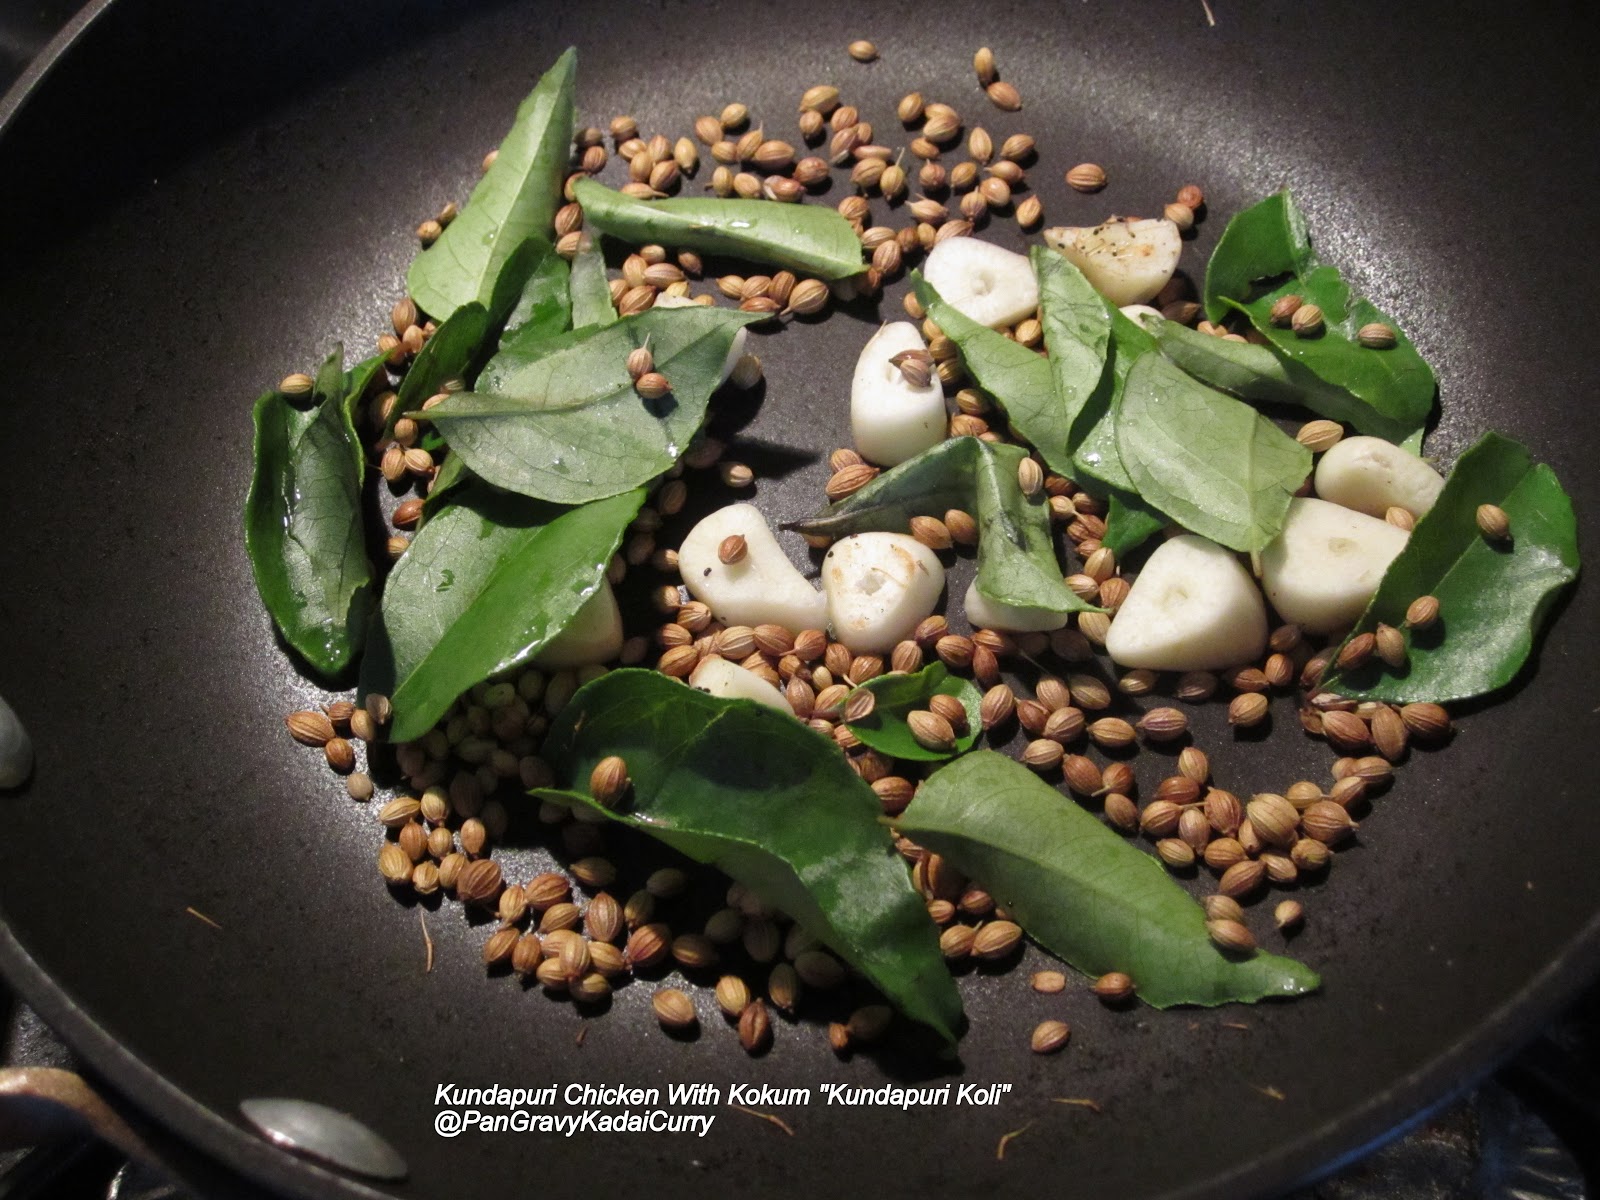
    • Dry fry the coriander seeds, curry leaves and garlic for 3-4 minutes on medium flame until the seeds emit aroma.
    • Soak  Kokum in a cup of hot water for 20 minutes (To facilitate easy extraction of juice)
    • Roughly grind dry fried ingredients. To it add  the soaked red chilies, 1/2 diced onions and grind it to a coarse paste along with little salt.
    • Rub the chicken with the coarse paste.Let it sit for at-least 2 hours. I usually let it sit in the refrigerator.
    • In a tbsp of Oil, brown the chicken pieces. Remove from pan.
    • In the same pan, add the diced onions and fry till translucent. Add the tomatoes and cook for a couple of minutes.
    • Add red chili powder, coriander powder, turmeric powder and garam masala. Stir to incorporate. Move the chicken back and let it coat with the spiced onion-tomato gravy evenly. 
    • Squeeze the Kokum and extract juice. Pour it into the pan. Add 1 to 1-1/2 Cups water. It all depends on how thick or thin you want the curry.
    • Add salt as needed and let the chicken cook in medium flame for about 15 minutes or until it is 95% cooked.
    • Check for taste. Add more chili powder or salt if needed. Grind the grated coconut balls with milk. Pour it over the chicken. Let is cook for 5 more minutes. 
    • Garnish with Cilantro and the curry is ready.


    Enjoy!
    Read More...

    Sunday, April 29, 2012

    Fabulous Meatball Sliders With Avocado Berry Salad

    Day7: This is sort of a spin-off from my previous posts. Combined 2 recipes to make one brand spanking new dish. We at home truly enjoyed these bite-site sliders to the fullest with the avocado-berry salad on the side.
    Here is a round-up of all the fermented foods I made this week-
    #7 in my LustList: Antique Style Fine Jewellery: When it comes to Jewellery Less is NOT more.
    1.Long Pearl and Ruby Necklace worn by the gorgeous Actress Deepika Padukone.
    2. Kundan Style Choker Necklace worn by actress Sonam Kapoor.
    Now onto the recipe-
    Ingredients:
    For the Avocado-Berry Salad:
    • 2 Cups Mixed Greens
    • 1/4 Cup Chopped Strawberry
    • 1/4 Cup Chopped Avocado
    • 1-1/2 Tbsp Olive Oil
    • 1-1/2 Tbsp Lemon Juice
    • A few grinds of Black Pepper
    • Salt as needed
    Procedure:
    • Make the meatballs.
    • Sprinkle about 1/2 Tbsp of shredded cheddar cheese on top of each meatballs. 
    • Make the salad: Whisk Oil, lemon juice, ground pepper and salt in a wide bowl
    • Wash the greens and remove the excess water by using a salad spinner. Throw the greens, chopped berries and avocado and toss gently.
    • Set the salad aside.
    • Microwave the meatballs for a minute or until the cheese melts slightly.
    • Place the meatballs in between the cut slider buns. Insert toothpicks. Move to plate and eat it with the salad and orange juice.
    • Now take a bite out of these fabulous meatball slider. Oh, Yum!
    Vegetarian Option: Beet Sliders

    Blogging Marathon page for the other Blogging Marathoners doing BM#15  
    Enjoy!
    Read More...