Ingredients:
If you want to take this one step ahead, you may try the Lachedar Paratha, which is a bit time-consuming to mak, with layers and all but totally worth it!
Enjoy!
Check out the Blogging Marathon page for the other Blogging Marathoners doing BM#18
- 3 to 3-1/2 Heaped Scoops All-Wheat (No-Maida) Atta Flour (I used Aashirvaad Brand)
- 3 Tbsp Low-fat Buttermilk
- 1 Tsp Olive Oil
- 1-1/4 to 1-1/2 Cups Warm Water
- 1/4 Tsp Salt
- Add the Atta Flour to the Food Processor.
- Pour the buttermilk, oil and add salt. Close the lid and run the processor at medium speed. Sice buttermilk has lactic acid, it helps to soften the dough.
- As the food processor runs, pour the warm water through the spout/mouth at the top in a steady stream. After 1-1/4 cups add it in small amounts. The dough will start forming into "granules" and then start clumping together. This is an indication to stop adding water. Switch off the processor.
- Test the dough consistency with fingers. If the dough is firm and pliable then collect the clumps and add it to a pan.
- Knead until it forms a smooth pliable dough. If planning on making Roti within the next hour or so do this: Sprinkle about 1/4 Tsp water on the top of the dough and on the sides of the pan. Lid the pan and let the dough rest for an hour. If planning on making Roti the following day or 2 do this:Smear little oil and cling- wrap the dough and refrigerate. When ready to roll-out, bring it to room temperature by nuking in the microwave for NOT MORE THAN 15 seconds. More than that will cook the dough.
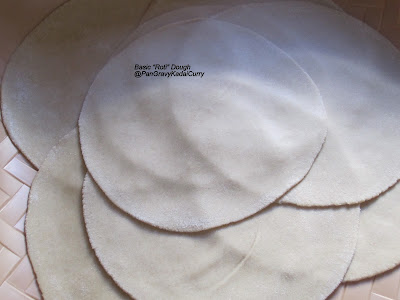
- Divide the dough into meyer-lemon sized/golf-ball sized balls.
- Roll them between the palm of your hand to a smooth ball and flatten them to discs.
- Dredge them with "Atta flour".
- Roll them to "evenly-thick" discs of 1/10" thick. That is the optimal thickness of the Roti.
- Repeat the above 2 steps for the remaining discs.
- Heat a cast-iron griddle or tava. Once it is hot(test it by sprinkling some water..if it sizzles then it is hot enough), reduce the flame to medium, spray oil from a mister and smear it evenly with a paper towel. Add the Roti and fry for about minute or until you see several brown spots on one side. Flip and repeat. You may spray some oil if you wish.
- Pressing it gently with an offset spatula to aid "puffing-up".
- If the dough was rolled out evenly and the heat was the right amount then the Roti will puff up. Do not overcook the Roti. The longer it is on the griddle, the harder it will turnout. After making the roti let it cool for a minute and then layer up one on top of another in a hot-pack so it keeps warm until it is ready to be consumed. They are best when eaten warm with lentil-based curries or chicken/lamb curries/kurma.
If you want to take this one step ahead, you may try the Lachedar Paratha, which is a bit time-consuming to mak, with layers and all but totally worth it!
Enjoy!
Check out the Blogging Marathon page for the other Blogging Marathoners doing BM#18


Those rotis look PERFECT.. You have GREAT roti rolling skills. Adding buttermilk is new to me. Will have to try next time.
ReplyDeleteFood processor is the best for roti maker.
ReplyDeleteVery useful post for beginners. Well explained.
ReplyDeleteDivya's Culinary Journey
Showcase- FUN IN THE SUN
Bake along challenge # 4 - Peanut Butter
Love lock series- Breads
you make it look so easy and I love that you posted food processor method
ReplyDeletelooks so tempting and loved your detailed explanation with pictures...
ReplyDeleteVIRUNTHU UNNA VAANGA
Those rotis look perfect n loved the food processor method
ReplyDeleteWat a wonderful and useful post for beginners, you roll them prefectly well.
ReplyDeleteyummy recipe
ReplyDeleteGood post CL..those lacha paratha look very inviting as well!
ReplyDeleteDone to perfection. love the details!
ReplyDeletePerfect rotis.. Never tried adding buttermilk..
ReplyDeleteI should try kneading the dough in the processor next time. I always knead it with my hands. Your rotis came out perfect
ReplyDeleteawesome post CL, i add yougurt to rotis and parathas but never tried using buttermilk, the pictures very cute n helpful, I too have a post in draft for rotis lets see when tht gets published :)
ReplyDeleteperfectly cooked tawa roti
ReplyDeleteperfectly done CL. I would do anythign to get those perfect rounded shaped rotis.. :) :) adding buttermilk is new to me, although sometimes I do add a tsp or two of warm milk
ReplyDeleteKalyani
Sizzling Tastebuds
Hosting Walk Through Memory Lane – July 2012
thats cooked perfectly. but i have never added buttermilk to it. interesting one
ReplyDeleteperfectly done. I let the phulkas puff out directly on flame (if on a gas stove) or on a perforated phulka stand (if on an electric stove).
ReplyDelete